Okay, okay, these are really Apple Turnovers but they don’t look the same as an Apple Turnover. I had planned to make this look more like pouches but there was a mishap, which I’m happy to say turned out well. I’m calling them Puff Pastry Apple Beds. Before I get to the story of why they are called Puff Pastry Apple Beds, let me show you the process I went through to make these. It’s super easy.
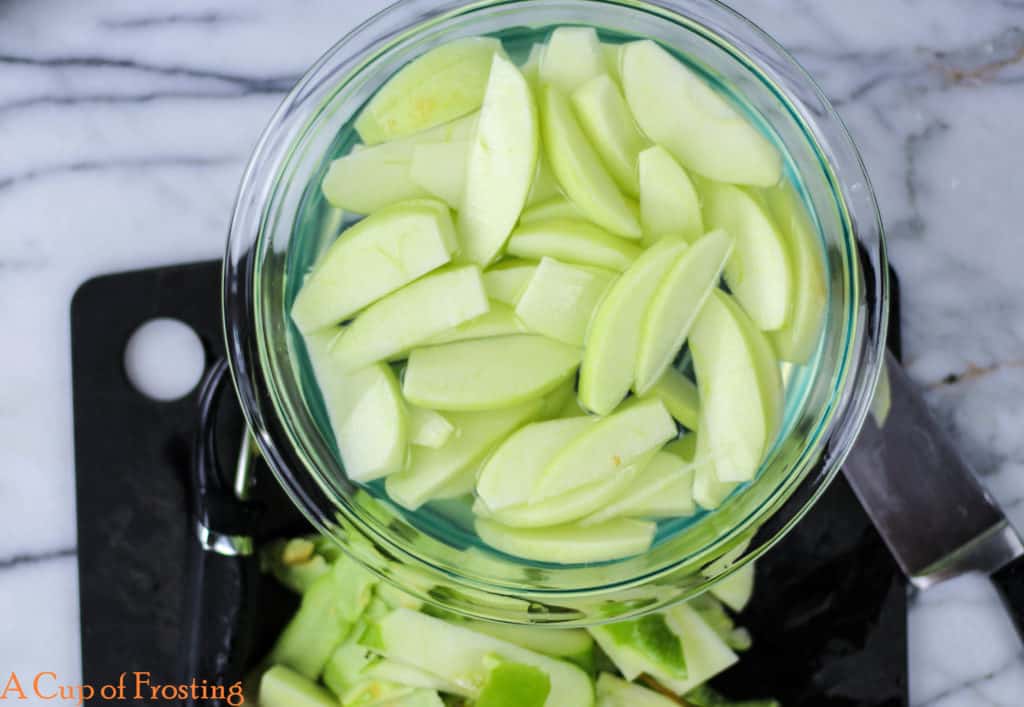
First, peel a couple Granny Smith Apples. Then core and slice both apples into thin slices. Put the slices into a bowl of water with a bit of lemon juice. This will keep them from getting brown.
When your done slicing up the apples, drain the water from the bowl and dry the apples with a couple paper towels. In a skillet, cook the apples slices with butter, sugar and cinnamon over medium heat for a few minutes. Mix cold water with corn starch and add it to the skillet.
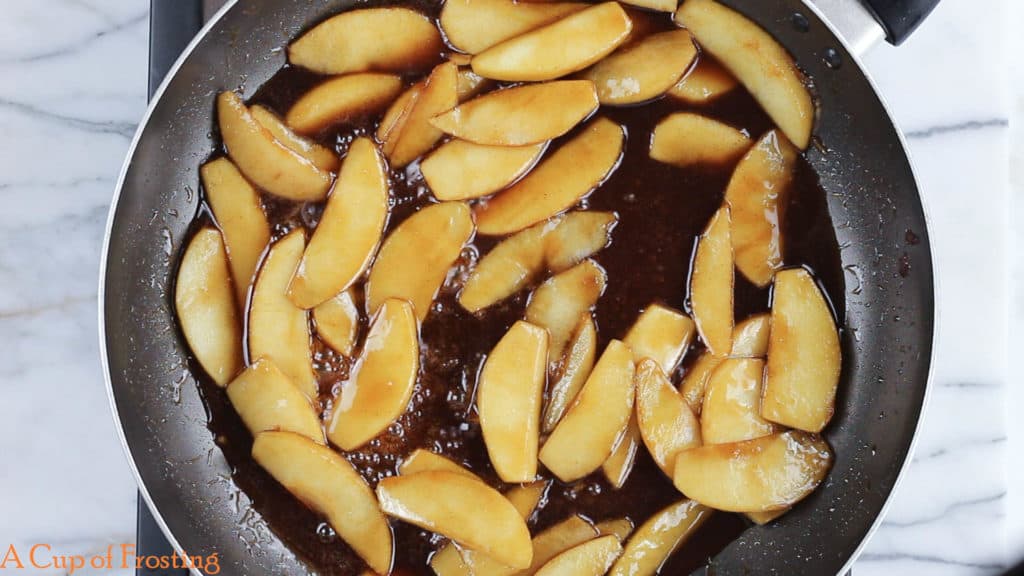
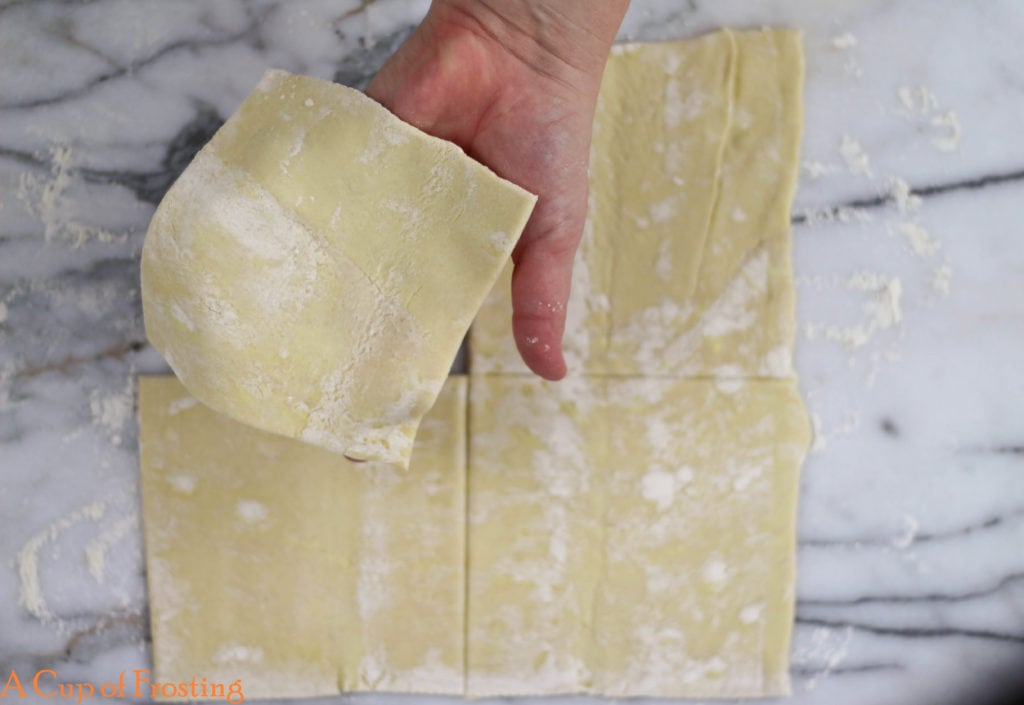
Cook for a couple more minutes then remove the pan from the heat and set aside. The sauce will thicken up as it cools. While the apple mixture is cooling, preheat oven and unfold on thawed puff pastry sheet over a lightly floured work surface. Pinch together any of the puff pastry that is coming apart. Cut the puff pastry into 4 equal squarish pieces with a pizza cutter. It may not be perfect but it’s okay.
Put the puff pastry squares on a parchment paper lined baking sheet leaving a couple inches between each square. Spoon 1/4 of the apple mixture into the middle of each puff pastry square. Now, working on one puff pastry square at a time, bring up all 4 corners to the middle and pinch them together, making a pouch like form.

Place the pouches into the preheated oven for 25 minutes. Cute aren’t they….
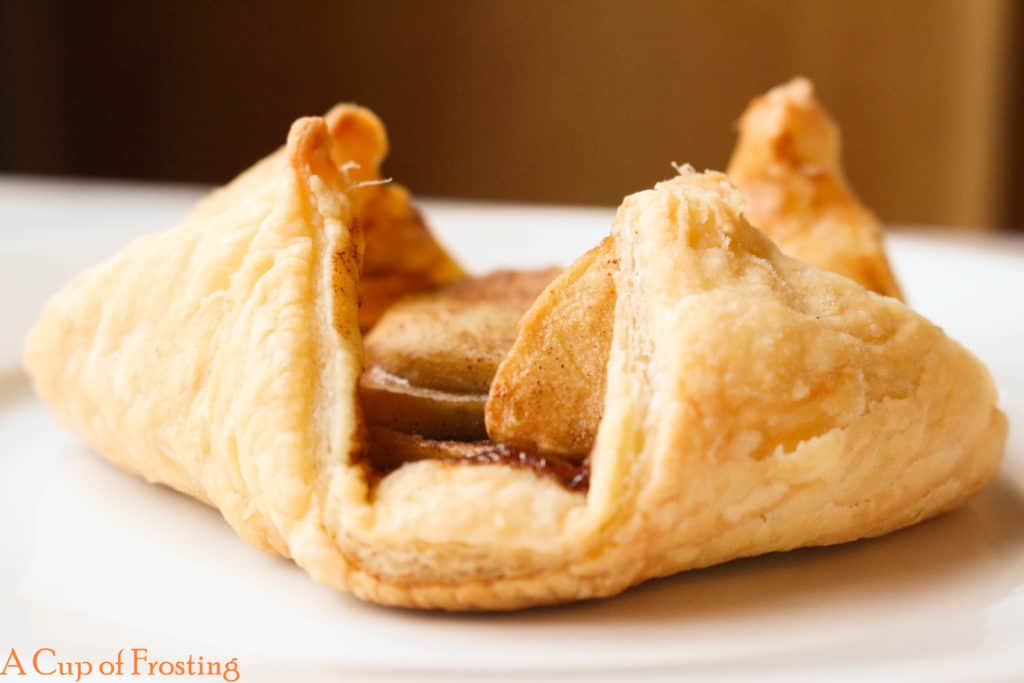
Here is the story of why these are now called Puff Pastry Apple Beds instead of Apple Pouches. One of the first times I was making them for a dinner party I was doing exactly as I had done in the steps above, they were going to be apple pouches but I forgot to use egg wash to get the pouches to stick together. Ooppps. I had waited until we had all started eating our dinner and popped these in the oven so they would be warm when I pulled them out for dessert time. When the “pouches” came out of the oven, they had opened up like the very sunny picture below.
Nnnooooo!
This couldn’t be happening!
I wanted to impress my friends with my puff pastry and apple dessert making skills. GAH!
I had already decided I was going to serve cute “Apple Pouches” with caramel-vanilla ice cream. These were definitely NOT pouches. They were funky looking. I’m sure they still tasted great but they didn’t look the way I wanted them to look…all cute and pouchy like. They were more like pastry beds with turned up corners. I thought my presentation was ruined until I realized that a scoop of ice cream fit very nicely in the center of these opened up pouches. My dessert presentation was saved. I am now calling them Puff Pastry Apple Beds. Puff Pastry Apple Beds are the new thing, at least I’m trying to make them the new thing.?
If you aren’t taken with the Puff Pastry Apple Beds shape and want a shape more like a pouch, first put egg wash on each corner of the pastry square before bringing all the corners to the middle and pinching them together. Personally, I’m a fan of the beds because they hold the toppings so well.
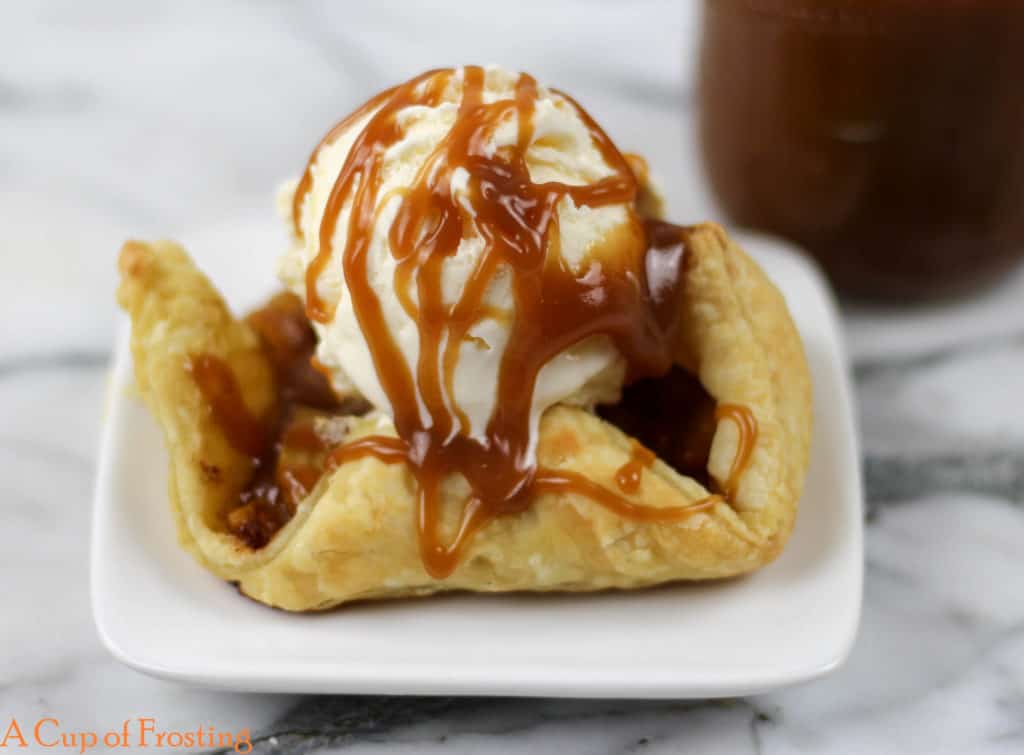
These Puff Pastry Apple Beds are delicious on their own but are extra special when topped with a scoop of vanilla ice cream and my Homemade Caramel Sauce. Enjoy!

Puff Pastry Apple Beds
Ingredients
- 2 tablespoons lemon juice
- 3 cups of water
- 2 Granny Smith apples peeled, cored and thinly sliced
- 2 tablespoons butter
- 1/2 cup brown sugar
- 1/2 teaspoon ground cinnamon
- 1 tablespoon cornstarch
- 1 tablespoon cold water
- 1 sheet puff pastry thawed
Instructions
- In a large bowl, combine the lemon juice and water. As you slice the apples, put the slices in the water to keep them from browning.
- Drain the apples and pat dry. In large skillet melt the butter over medium heat. Add the apple slices to the skillet and turn up the heat to medium-high. Cook the apples while stirring for about 3 minutes. Stir in the brown sugar and cinnamon. Continue to cook and stir for 2 more minutes.
- In a small bowl, mix the cornstarch and cold water together then pour into the hot apple mixture. Cook for another 2 minutes or until the sauce has thickened. Turn off the heat and let the apple mixture cool.
- Preheat the oven to 400 degrees F.
- Unfold the thawed puff pastry sheet. Cut the puff pastry into a square. Cut that square into 4 smaller but equal squares. Spoon the apple mixture evenly into the center of each square. Fold all the corners of the square into the middle so all the corners touch, pinch them together. They will come apart when baking because there is no egg wash to hold them together. It’s okay.
- Bake for 25 minutes. The Puff Pastry Apple Beds are done when they are puffed and lightly browned. Top with ice cream, caramel sauce and/or whipped cream. Enjoy!